Embarking on a home interior painting project can breathe new life into your living spaces, reflecting your personal style and enhancing the atmosphere of your home. From selecting the perfect color palette to mastering the art of painting techniques, there’s plenty to consider when revamping your space. In this comprehensive guide, we’ll delve into the ins and outs of home interior painting, arming you with the knowledge and tips needed for a successful and enjoyable experience.
The first step to a successful home interior painting project is to gather inspiration and determine the desired look and feel for your space. Whether you’re drawn to the minimalist charm of neutral hues or the bold statement of vibrant colors, the right paint choice can make all the difference in transforming your home. Take the time to explore various color schemes, consider the room’s purpose and lighting, and don’t be afraid to think outside the box to create a space that truly reflects your personality.
Next, it’s essential to plan and prepare for your painting project. This includes selecting the right paint type and finish, estimating the amount of paint needed, and gathering all necessary tools and supplies. Additionally, proper preparation of the surfaces to be painted, such as cleaning, patching, and priming, is crucial for achieving a professional-looking result. By taking the time to plan and prepare, you’ll set yourself up for a smooth and efficient painting process, resulting in a beautiful and long-lasting finish.
The Ultimate Guide: 9 Essential Home Interior Painting Tips for a Remarkable Makeover
Table of Contents
1. Choose High-Quality Paint for Lasting Results
The quality of the paint you choose plays a significant role in the final outcome of your home interior painting project. High-quality paint provides better coverage, is more durable, and is less likely to fade or peel over time. Invest in premium paint to ensure a long-lasting, beautiful finish.
Selecting the right paint brand and understanding the materials that go into making high-quality paint is crucial for achieving a long-lasting, beautiful finish. Here’s more information about some top brands, the materials used in high-quality paints, and their pros and cons.
Top Paint Brands
- Benjamin Moore: Known for its premium quality and wide range of color options, Benjamin Moore offers a variety of paint lines, including their popular Regal Select and Aura lines. Both provide excellent coverage and durability.
- Sherwin-Williams: Another reputable brand, Sherwin-Williams offers high-quality paints such as their Duration Home and Emerald lines, which are known for their stain resistance and washability.
- Behr: A popular choice for DIY enthusiasts, Behr offers quality paints at a more affordable price point. Their Marquee line is well-regarded for its one-coat coverage and durability.
Materials in High-Quality Paint
- Pigments: High-quality paints contain more finely ground pigments, which provide better color saturation and coverage.
- Binders: Premium paints typically use acrylic or latex binders, which help the paint adhere to surfaces and resist peeling or chipping.
- Solvents: Quality paints use solvents that evaporate at a slower rate, allowing the paint to level out and dry evenly.
- Additives: These ingredients, such as mildewcides, help enhance the paint’s performance by improving flow, leveling, and resistance to mold and mildew.
Pros of High-Quality Paint
- Better Coverage: Premium paints often require fewer coats, saving you time and effort.
- Durability: High-quality paints are more resistant to fading, chipping, and peeling, ensuring your paint job looks fresh for a longer time.
- Easier Application: Quality paints have better leveling properties, making it easier to achieve a smooth, even finish.
- Low VOCs: Many premium paints have lower levels of volatile organic compounds (VOCs), which can cause respiratory issues and contribute to air pollution.
Cons of High-Quality Paint
- Cost: The main drawback of high-quality paint is the higher price tag compared to budget options. However, considering the benefits and the potential need for fewer coats, the investment may be worth it in the long run.
2. Select the Right Tools for the Job
Investing in the right tools is essential for achieving professional-looking results in your home interior painting project. Here’s more information about top brands, price estimations, and tips for selecting the best painting tools.
Top Brands for Painting Tools
- Purdy: Purdy is a well-known brand that offers high-quality brushes, rollers, and other painting accessories. Their products are designed for durability and performance, making them a popular choice among professionals and DIYers alike.
- Wooster: Another reputable brand, Wooster offers a wide range of painting tools, including brushes, roller covers, and extension poles. Their products are designed to provide excellent paint pickup and release, ensuring a smooth and even finish.
- 3M: A leading brand in the painting industry, 3M offers a variety of painter’s tape, drop cloths, and other painting accessories. Their products are known for their performance and reliability.
Price Estimations
- Paintbrushes: High-quality paintbrushes typically range from $10 to $20, depending on the size and type of bristles. Investing in a quality brush will ensure better paint application and a smoother finish.
- Roller Covers: Expect to pay between $4 and $10 for a quality roller cover, depending on the nap length and material. The right roller cover will help you achieve even coverage and reduce the risk of lint or roller marks on your walls.
- Paint Trays and Liners: A paint tray can cost anywhere from $5 to $15, while disposable liners usually cost around $1 to $3 each. Using liners will save you time on cleanup and protect your tray from paint buildup.
- Painter’s Tape: High-quality painter’s tape can range from $5 to $10 per roll, depending on the width and length. Investing in the quality tape will help prevent paint bleed and ensure clean, sharp lines.
Tips for Selecting Painting Tools
- Choose brushes with synthetic bristles for latex paint and natural bristles for oil-based paint. Angled brushes are ideal for cutting in and painting trim, while flat brushes work well for larger surfaces.
- Select roller covers with the appropriate nap length for your wall texture. Smooth surfaces require a shorter nap (3/16 to 1/4 inch), while rough surfaces need a longer nap (3/8 to 1/2 inch or more).
- Opt for a sturdy paint tray with a deep well for holding paint and a ribbed slope for removing excess paint from the roller.
- Look for painter’s tape that is specifically designed for your surface types, such as delicate surfaces, textured surfaces, or multi-surfaces. This will ensure proper adhesion and clean removal.
3. Properly Prepare Your Surfaces
Taking the time to properly prepare your surfaces before painting is crucial for achieving a flawless finish. Here’s more information about common problems you may encounter during preparation and how to deal with them, along with time estimations for each step.
Common Problems and How to Deal with Them
- Dirt and Grease: Accumulated dirt, grease, and grime on your walls can cause adhesion problems and affect the final appearance of your paint. Clean walls with a mild detergent solution, using a sponge or cloth. For stubborn grease spots, use a degreaser or TSP (trisodium phosphate) solution. Rinse the walls thoroughly and allow them to dry completely before painting.
- Cracks and Holes: Small cracks, holes, or dents in your walls can cause an uneven paint finish. Fill any imperfections with a spackling compound, using a putty knife to apply it smoothly. Allow the compound to dry according to the manufacturer’s instructions, then sand the area with fine-grit sandpaper to create a smooth surface.
- Peeling or Flaking Paint: If your existing paint is peeling or flaking, it’s essential to remove the loose paint before repainting. Use a paint scraper, putty knife, or wire brush to remove the loose paint. For larger areas, consider using a power sander or paint remover. Once the loose paint is removed, sand the edges to create a smooth transition between the remaining paint and the bare surface.
- Wallpaper: If your walls are covered with wallpaper, it’s best to remove it before painting. Use a wallpaper steamer or a wallpaper removal solution to loosen the adhesive, then carefully peel away the wallpaper. If any adhesive residue remains, clean the walls with a TSP solution and rinse them thoroughly.
Time Estimations
- Cleaning Walls: Depending on the size of the room and the level of dirt and grease, cleaning your walls can take anywhere from 1 to 3 hours.
- Filling Cracks and Holes: The time needed to fill imperfections will vary based on the number and size of the repairs. Small repairs can take as little as 30 minutes, while larger repairs may require several hours to complete.
- Removing Peeling Paint or Wallpaper: The time it takes to remove peeling paint or wallpaper will depend on the size of the area and the method used. Expect to spend anywhere from 2 to 6 hours or more on this task.
4. Prime Your Walls for Better Paint Adhesion
Applying a primer before painting ensures better paint adhesion, improves coverage, and can even help hide stains or dark colors. Choose a primer that’s compatible with your paint type and follow the manufacturer’s instructions for the best results.
Types of Primers
- Latex Primer: Suitable for most interior surfaces, latex primer is water-based and easy to clean up. It’s ideal for drywall, softwoods, and non-galvanized metals, and it works well with both latex and oil-based paints.
- Oil-Based Primer: Offering excellent adhesion and stain-blocking properties, oil-based primer is best for surfaces with water or smoke damage, as well as for sealing wood knots and sap streaks. It can be used with oil or latex paints, but it requires a solvent for cleanup.
- Shellac Primer: Shellac primer has strong odor-blocking capabilities and dries quickly, making it ideal for use on smoke-damaged surfaces or areas with persistent odors. It’s compatible with both latex and oil-based paints but requires denatured alcohol for cleanup.
Benefits of Priming
- Improved Adhesion: Priming your walls creates a uniform, slightly porous surface that allows the paint to adhere more effectively, reducing the risk of peeling or chipping.
- Better Coverage: A coat of primer can help mask minor surface imperfections and create a more even base for the paint, leading to better coverage and fewer coats.
- Uniform Finish: Primers help prevent the original color or surface texture from showing through the new paint, resulting in a more uniform and consistent finish.
When to Use Primer
- New Drywall: Unpainted drywall is highly porous and can absorb paint unevenly. Priming your walls will create a smoother surface and ensure better paint coverage.
- Stain Blocking: If you’re dealing with stains from water, smoke, or mold, a primer with stain-blocking properties will help prevent the stains from bleeding through the new paint.
- Color Changes: When you’re drastically changing the color of a room, using a primer can make the new color appear more vibrant and accurate, reducing the number of coats needed for full coverage.
- Repainting Over Glossy or Oil-Based Paint: If you’re repainting over a glossy or oil-based surface, using a primer will help the new paint adhere more effectively and create a smoother finish.
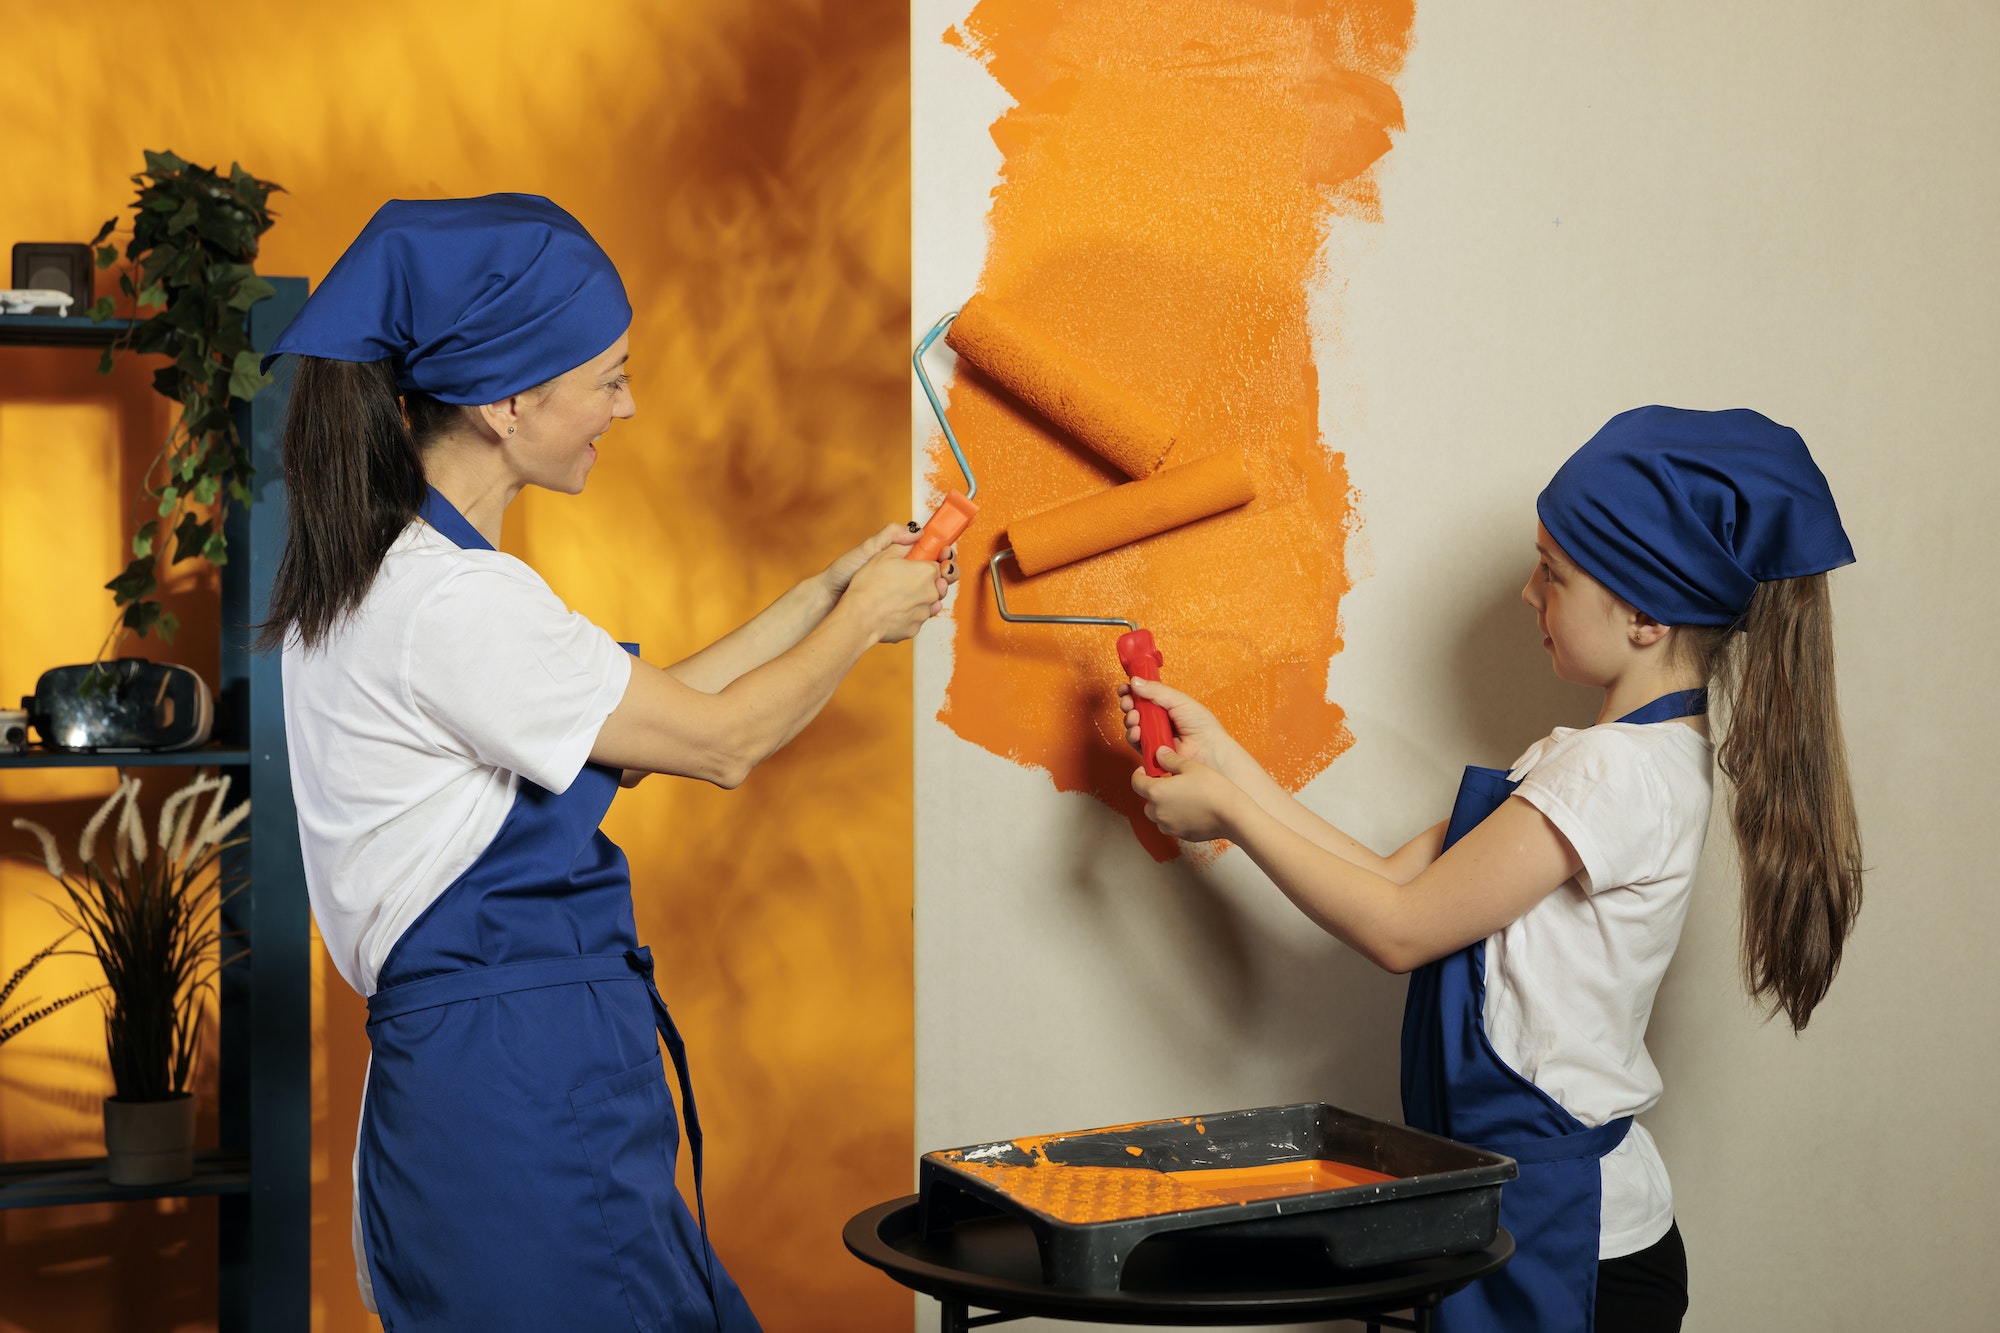
5. Use Proper Painting Techniques
Utilizing the correct painting techniques can make a significant difference in the overall appearance and quality of your home interior painting project. Here’s more information on the difficulty level of various techniques and any special tools that may be needed.
Basic Painting Techniques
- Cutting In: This technique involves painting the edges of a wall or around the trim, where a roller cannot reach. Use an angled brush and a steady hand to create clean, straight lines. Difficulty level: Moderate, as it requires precision and control.
- Rolling: Applying paint with a roller allows for quicker and more even coverage on larger wall surfaces. Start with a “W” or “M” pattern, then fill in the gaps with vertical strokes, ensuring even pressure for a uniform finish. Difficulty level: Easy to moderate, depending on wall size and texture.
- Feathering: To avoid roller marks or lap lines, feather the paint by lightly lifting the roller at the end of each stroke. This technique creates a smooth transition between areas of paint application. Difficulty level: Moderate, as it requires practice to master the right pressure and motion.
Advanced Painting Techniques
- Faux Finishing: Faux finishes, such as glazing, sponging, or rag-rolling, can add texture and depth to your walls. These techniques typically require special tools and materials, such as glazes, sponges, or rags, as well as a higher level of skill. Difficulty level: Challenging, as it involves multiple steps and may require artistic ability.
- Stripes or Patterns: Painting stripes or patterns on your walls can create a striking visual effect. This technique requires careful measurement, masking with painter’s tape, and precise brushwork to achieve clean, sharp lines. Difficulty level: Challenging, due to the need for accuracy and attention to detail.
- Murals or Accents: Painting a mural or accent on your wall can add a unique, personalized touch to your home. This technique may require artistic talent, specialized brushes, or even airbrushing equipment, depending on the complexity of the design. Difficulty level: Challenging to expert, depending on the intricacy of the artwork and the tools used.
Tips for Using Proper Painting Techniques
- Choose the right tools: Selecting the appropriate brushes, rollers, and other tools for your specific painting technique is essential for achieving professional results.
- Practice makes perfect: If you’re new to a particular painting technique, practice on a scrap piece of drywall or cardboard to hone your skills before applying it to your walls.
- Work in manageable sections: Break your project into smaller sections, focusing on one area at a time to maintain a wet edge and ensure a smooth, seamless finish.
- Be patient: Allow each coat of paint to dry completely before applying additional coats or attempting advanced techniques, as rushing the process can lead to mistakes or uneven results.
6. Consider Hiring a Professional Painting Service
When it comes to home interior painting, deciding whether to tackle the project yourself or hire a professional can be a challenging decision. Here’s more information on what to consider when making this choice, as well as the pros and cons of each option.
Factors to Consider
- Time: Consider the amount of time you have to dedicate to the project. DIY painting can be time-consuming, especially if you’re inexperienced or tackling a large or complex job. Professional painters can often complete the work more quickly and efficiently.
- Skill Level: Assess your skill level and experience with painting. If you’re confident in your abilities, DIY painting can be a satisfying and cost-effective option. If you’re unsure or inexperienced, hiring a professional may ensure a higher-quality result.
- Budget: Compare the costs of DIY painting, including paint, supplies, and any equipment rentals, with the estimates provided by professional painting companies. While DIY may be less expensive, consider the value of your time and the potential for mistakes or rework.
- Scope of the Project: Evaluate the complexity and size of the project. Simple, straightforward painting jobs may be suitable for DIY, while more intricate or extensive projects might benefit from the expertise of a professional.
DIY Painting Pros and Cons
Pros:
- Cost Savings: DIY painting can be more cost-effective, as you’ll save on labor costs associated with hiring a professional.
- Personal Satisfaction: Completing a painting project yourself can provide a sense of accomplishment and pride in your work.
- Control: When you handle the painting yourself, you have complete control over the materials used, the timeline, and the overall quality of the work.
Cons:
- Time-Consuming: DIY painting can be time-consuming, particularly if you’re inexperienced or working on a large project.
- Learning Curve: If you’re new to painting, there may be a learning curve involved, which could result in mistakes or an uneven finish.
- Limited Expertise: Without professional experience, you may be less equipped to handle complex techniques, difficult surfaces, or other challenges that may arise during the project.
Hiring a Professional Pros and Cons
Pros:
- Expertise: Professional painters have the experience and skills necessary to achieve a high-quality, consistent finish.
- Time Savings: Hiring a professional can save you time, as they can often complete the project more quickly and efficiently than a DIY approach.
- Reduced Stress: With professional handling of the painting, you won’t have to worry about mistakes, cleanup, or other challenges that may come with DIY painting.
Cons:
- Cost: Hiring a professional painter can be more expensive than doing it yourself, due to labor costs and other fees.
- Less Control: When you hire a professional, you may have less control over the materials used and the timeline of the project.
- Finding a Reliable Painter: It can be challenging to find a reputable, trustworthy painting company that meets your needs and budget.
7. Be Mindful of Costs and Budgeting
When planning a home interior painting project, it’s essential to be mindful of costs and create a budget that suits your needs. Here’s a comparison of estimated costs for a DIY approach versus hiring a professional, along with a breakdown of detailed items to consider.
DIY Painting Estimated Costs
- Paint: Depending on the quality and type of paint, prices can range from $15 to $50 or more per gallon. Calculate the amount of paint needed for your project by considering the square footage of the walls and the number of coats required.
- Primer: Primer prices can range from $10 to $25 per gallon, depending on the type (latex, oil-based, or shellac). Factor in the number of coats needed to be based on the surface and desired finish.
- Supplies: You’ll need to purchase or rent tools and materials, such as brushes, rollers, painter’s tape, drop cloths, and paint trays. These costs can range from $50 to $200, depending on the quality and quantity needed.
- Equipment Rentals (if needed): If your project requires specialized equipment, such as a paint sprayer or scaffolding, factor in rental costs, which can range from $25 to $100 per day, depending on the item.
Total DIY Estimated Cost: For an average-sized room (12×12 feet), the total DIY cost can range from $150 to $500, depending on the paint, supplies, and equipment needed.
Hiring a Professional Estimated Costs
- Labor Costs: Professional painters typically charge between $20 and $50 per hour, depending on their experience and expertise. The total labor cost will depend on the size of your project and the number of painters needed.
- Paint and Materials: When hiring a professional, the cost of paint and materials may be included in the quote or billed separately. As mentioned earlier, paint costs can range from $15 to $50 or more per gallon, while materials can add an additional $50 to $200 to the total cost.
- Additional Services: Some painting companies may charge extra for services such as wall repairs, wallpaper removal, or furniture moving. Ensure you have a clear understanding of these fees before signing a contract.
Total Professional Estimated Cost: For an average-sized room (12×12 feet), you can expect to pay between $300 and $800 for a professional interior painting job, including labor and materials.
8. Follow Safety Precautions
Ensuring safety during your home interior painting project is crucial to protect yourself, your family, and your property. Here’s a comprehensive checklist of safety precautions to follow before, during, and after the painting process.
Before Painting
- Clear the area: Remove furniture, artwork, and other belongings from the room to minimize trip hazards and protect your items from paint splatters.
- Cover your floors: Lay down drop cloths or plastic sheeting to protect your floors from paint spills and debris.
- Ventilate the space: Open windows and doors to ensure proper ventilation, which is essential when working with paint fumes and other chemicals.
- Assemble your safety gear: Gather items such as gloves, goggles, masks or respirators, and protective clothing to wear during the painting process.
During Painting
- Ladder safety: If you’re using a ladder, ensure it’s set up on a stable, level surface, and always maintain three points of contact (two feet and one hand, or two hands and one foot) when climbing or descending.
- Proper lifting techniques: When moving heavy paint cans or equipment, use proper lifting techniques by bending at the knees, keeping your back straight, and holding the load close to your body.
- Use caution with electrical outlets: Turn off the power to the room you’re working in and cover electrical outlets with painter’s tape to prevent accidents.
- Store paint and materials safely: Keep paint cans and other materials in a secure, well-ventilated area, away from heat sources, open flames, and children or pets.
- Stay aware of your surroundings: Be mindful of wet paint, trip hazards, and other potential dangers while working.
After Painting
- Dispose of materials responsibly: Follow local regulations and guidelines for the proper disposal of paint, solvents, and other materials.
- Store leftover paint: Seal and store leftover paint in a cool, dry place, away from heat sources and direct sunlight. Label the cans with the room and date for future reference.
- Clean your tools: Thoroughly clean brushes, rollers, and other tools with the appropriate solvent or water, depending on the type of paint used.
- Inspect the area: Check for any spills, debris, or other hazards before moving furniture and belongings back into the room.
9. Give Your Paint Time to Cure
Allow your freshly painted walls to cure for the recommended time before reinstalling fixtures or hanging artwork. This will ensure the paint has fully dried and hardened, preventing any accidental damage or marks.
Pro Tips
- Test paint colors on a small area of your wall before committing to a full room. Observe how the color looks in different lighting conditions to ensure it’s the perfect shade for your space.
- Use an angled brush for cutting in around trim, corners, and other tight areas for a cleaner, more precise finish.
- Consider using an extension pole for your paint roller to reach high walls or ceilings without the need for a ladder.
FAQs
Q: How do I choose the right paint color for my home interior painting project?
A: Start by considering the existing color scheme, furniture, and decor in the room. You may also want to take into account the room’s size, lighting, and intended purpose. Collect paint swatches, and test sample colors on your walls to see how they look in different lighting conditions. Don’t be afraid to think outside the box and explore various color combinations to create a unique and personalized space.
Q: What is the best type of paint for home interior painting?
A: The most commonly used paint for interior walls is water-based latex paint due to its easy application, quick drying time, and low odor. However, oil-based paints can be more durable and stain-resistant, making them suitable for high-traffic areas or surfaces that require frequent cleaning. When selecting paint, consider factors such as durability, sheen, and the specific needs of the room you’re painting.
Q: How long does it take for paint to dry during a home interior painting project?
A: The drying time for paint can vary depending on factors such as humidity, temperature, and the type of paint used. Generally, latex paints dry to the touch within 1 to 2 hours, while oil-based paints may take up to 8 hours or more. However, it’s essential to allow adequate time for the paint to cure fully before applying additional coats or hanging decorations, which can take anywhere from a few days to a couple of weeks, depending on the paint and environmental conditions.
Q: How often should I repaint my home interior?
A: The frequency with which you should repaint your home interior depends on factors such as wear and tear, personal preference, and the quality of the paint used. As a general rule of thumb, it’s recommended to repaint high-traffic areas like kitchens and hallways every 3 to 5 years, while living rooms and bedrooms can typically go 5 to 7 years between paint jobs. However, if you notice signs of wear, such as chipping or fading, you may need to repaint sooner.
Q: Can I paint over wallpaper during my home interior painting project?
A: While it’s possible to paint over wallpaper, it’s generally not recommended, as it can lead to uneven surfaces and cause the wallpaper to peel or bubble over time. Instead, it’s best to remove the wallpaper and prep the walls for painting by cleaning, repairing any damage, and applying a suitable primer. If removing the wallpaper isn’t an option, make sure to prime the wallpaper with an oil-based primer to create a stable surface for the paint to adhere to.
Q: How do I estimate the amount of paint needed for my home interior painting project?
A: To calculate the amount of paint required, first measure the square footage of the walls to be painted (height x width). Then, divide the total square footage by the coverage rate listed on the paint can, which is typically between 250 and 400 square feet per gallon. Consider the number of coats needed and any additional factors, such as wall texture, to ensure you purchase enough paint for your project. It’s always a good idea to buy a little extra paint for touch-ups and future use.
Q: How long does it typically take for paint to dry?
A: Most latex paints dry to the touch within a few hours, but it’s best to wait at least 24 hours before applying a second coat or hanging any artwork. Oil-based paints may take longer to dry, often requiring up to 48 hours between coats.
Q: What is the best type of paint finish for high-traffic areas?
A: In high-traffic areas such as hallways or kitchens, choose a paint finish that’s durable and easy to clean, such as satin or semi-gloss.
In conclusion, transforming your home with a fresh coat of paint can be an exciting and rewarding endeavor, whether you choose to tackle it as a DIY project or enlist the help of a professional. By keeping our expert tips, safety precautions, and budgeting advice in mind, you can confidently embark on your home interior painting journey, creating a space that truly reflects your personal style and taste. So, grab your brushes, put on your favorite playlist, and get ready to breathe new life into your home. The canvas of your walls awaits your creative touch, and the possibilities are endless. Happy painting!


