Ansible is an opensource configuration management and orchestration tool that makes it easy to automate IT tasks in a multi-tier IT environment. With a single command, you can configure multiple servers and deploy applications without logging into each of the servers and doing the configuration by yourself. In doing so, Ansible simplifies tasks that would otherwise be time-consuming and tedious.
With the increase in the number of playbook files executing various automation tasks, things can get a bit complex. And that’s where Ansible roles come in.
What is an Ansible role?
An ansible role is a concept within Ansible that deals with ideas rather than events. Essentially, a role is a level of abstraction used to simplify how playbook files are written. A role provides a skeleton for reusable components such as variables, modules, tasks, and facts which can be loaded onto a Playbook file.
Practical application
To get a better understanding of how roles are used, let us consider a scenario where you have 8 tasks to be performed on 2 remote nodes. One approach would be to define all the tasks to be executed on the remote hosts on a single playbook file. However, this is tedious and will most likely add to the complexity of the playbook. A better approach would be to create 8 separate roles whereby each role will perform a single task and later call these roles in the ansible-playbook file.
One of the most benefits of using roles is that each role is independent of the other. The execution of one role does not depend on the execution of another role. Also, roles can be modified and reused thus eliminating the need for rewriting the plays and tasks in the Playbook file.
So, let’s assume you want to create a playbook file to install the LAMP stack on a Debian server. A better way of doing this is to start by creating 3 separate roles where each will install Apache, MariaDB, and PHP respectively on the remote host. Then write a playbook and call the roles in the playbook file. Suppose you have a second Debian server that you need to install Drupal CMS. Instead of rewriting the roles again, you can simply reuse the 3 roles you created earlier and add other roles for installing Drupal.
You get the drift?
Let’s now see how you can create Ansible roles.
How to create Ansible roles
To create a ansible roles from scratch run ansible galaxy command, example is shown below:
$ ansible-galaxy init role-name
For example, to create a role called my-role invoke the command.
$ ansible-galaxy init my-role
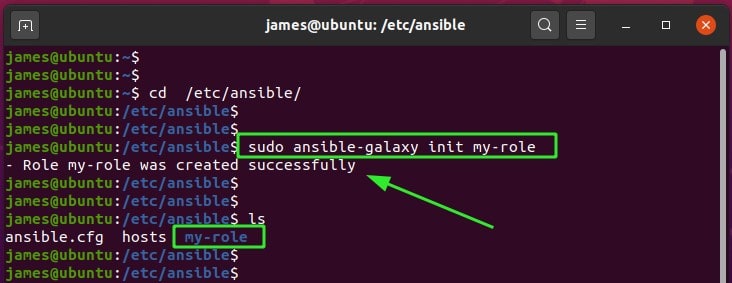
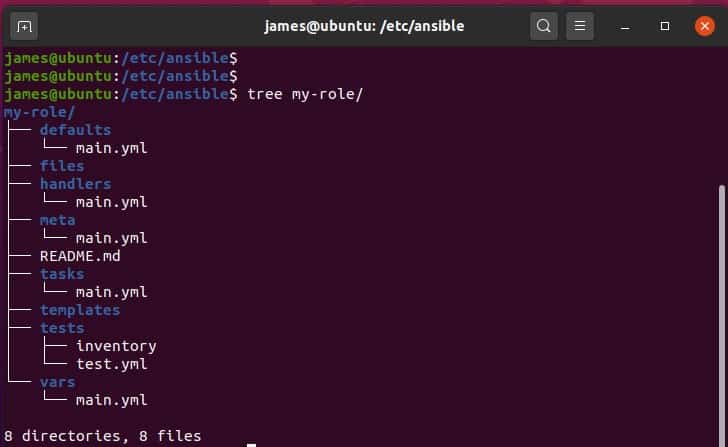
From the screen above, the command creates the my-role directory. This role directory contains the following directories or folders by default.
- The ‘defaults’ folder – This contains the default variables that will be used by the role.
- The ‘files’ folder – Contains files that can be deployed by the role.
- The ‘handlers’ folder – Stores handlers that can be used by this role.
- he ‘meta’ folder – Contains files that establish the role dependencies.
- The ‘tasks’ folder – It contains a YAML file that spells out the tasks for the role itself. Usually, this is the main.yml file.
- The ‘templates’ folder – Contains template files that can be modified and allocated to the remote host being provisioned.
- The ‘tests’ folder – Integrates testing with Ansible playbook files.
- The ‘vars’ folder – Contains variables that are going to be used by the role. You can define them in the playbook file, but it’s recommended you define them in this directory.
To view role directory structure, run tree command followed by role name.
$ tree <role-name>
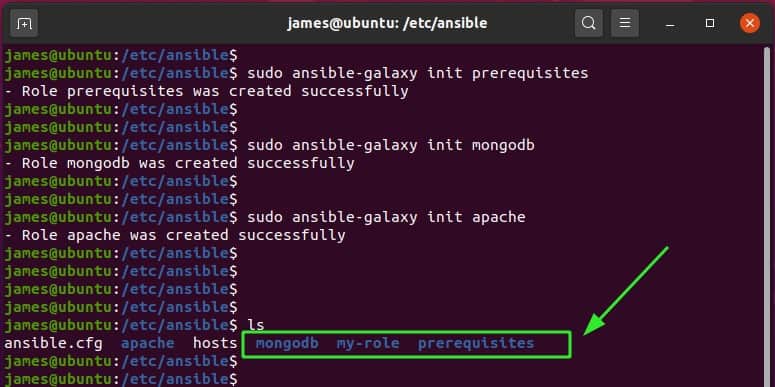
Now, for demonstration, we are going to create three ansible roles as follows:
- The prerequisites role – Installs git
- The mongodb role – Installs MongoDB database engine
- The apache role – Installs the Apache webserver
So, using the same syntax we used earlier, we are going to create the roles as follows:
$ sudo ansible-galaxy init prerequisites
$ sudo ansible-galaxy init mongodb
$ sudo ansible-galaxy init apache
The next step is to define each role that you have created. To achieve this, you need to edit the main.yml file located in the ‘tasks’ folder for each role.
role —> tasks —> main.yml
For example, to edit the prerequisites role, navigate as shown:
$ cd prerequisites/tasks/
Then edit the main.yml file.
$ sudo vim main.yml
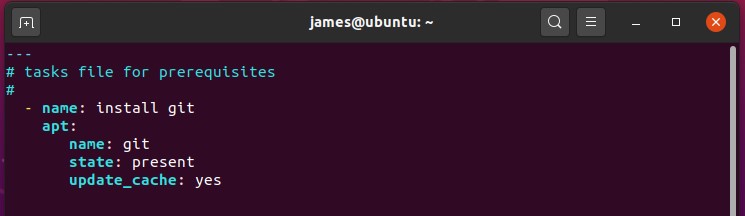
The role for installing git is defined as shown:
- name: Install git
  apt:
     name: git
     state: present
     update_cache: yes
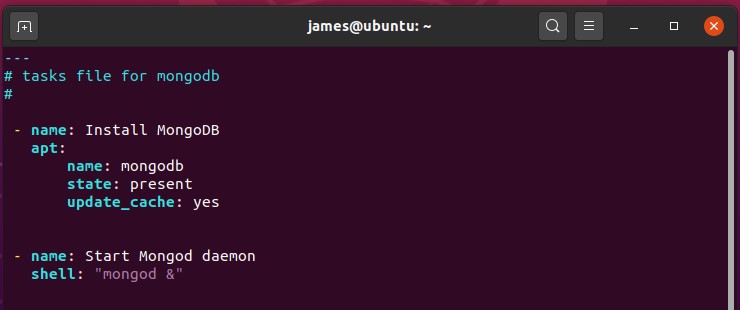
For MongoDB, we have 2 tasks. Installing MongoDB and starting the Mongod daemon.
- name: Install MongoDB
  apt:
     name: mongodb
     state: present
     update_cache: yes

- name: Start Mongod daemon
  shell: "mongod &"
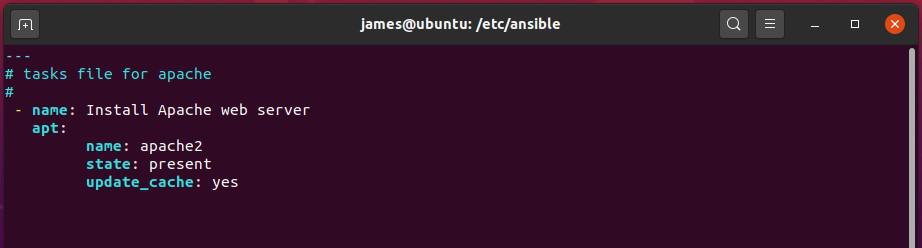
And finally, for Apache web server :
- name: install Apache web server
  apt:
     name=apache2
     state=present
     update_cache=yes
Lastly, we are going to create a playbook file called stack.yml and call the roles as shown.
---
- hosts: all
  become: yes
  roles:
        -  prerequisites
        -  mongodb
        -  apache
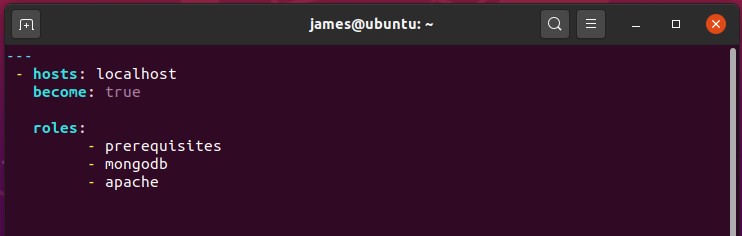
As you can see, the playbook file looks quite simple compared to defining each task for the host.
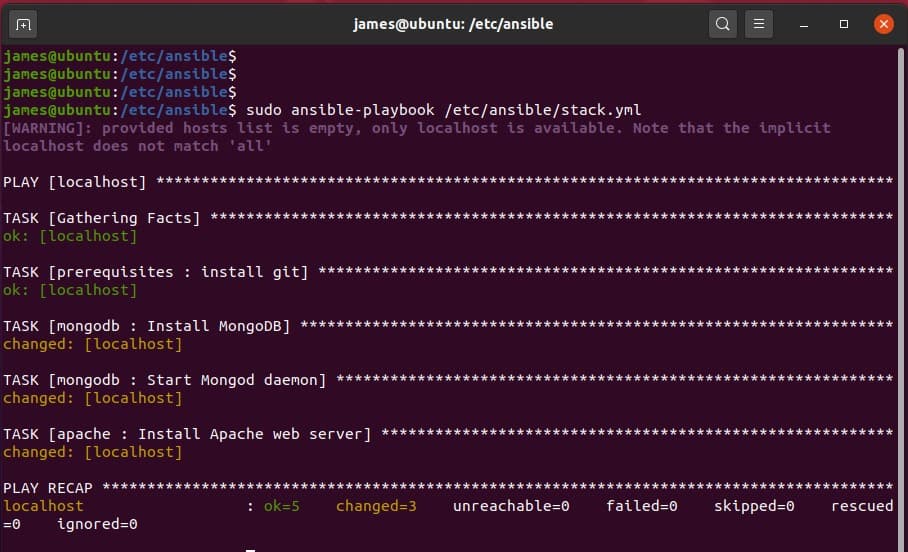
To ensure that our roles are working as expected, run the ansible playbook file as shown.
$ sudo ansible-playbook /etc/ansible/stack.yml
The playbook will execute all the roles as shown.
To ensure that the packages were installed successfully, we are going to check their versions as shown:
$ mongod --version
$ apachectl -v
$ git --version
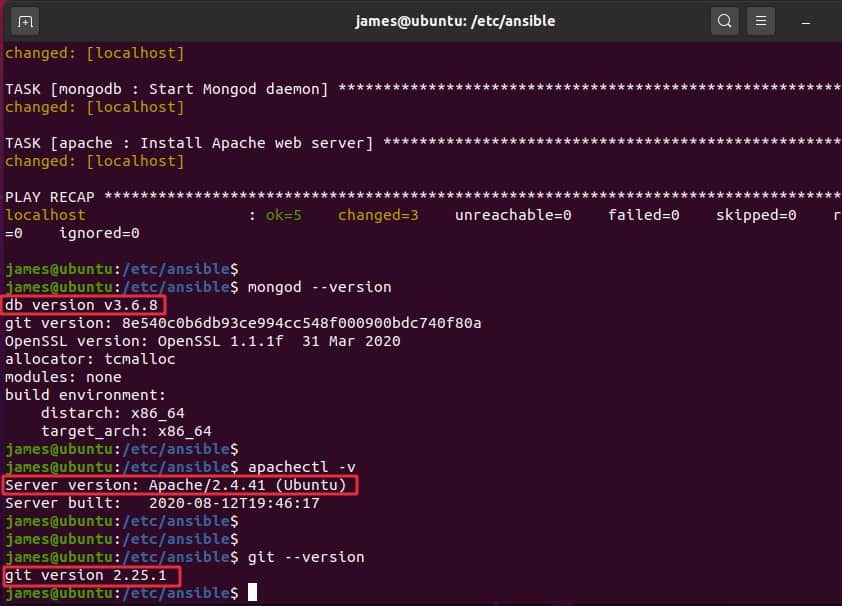
The output above confirms that indeed, the roles execute successfully and that the package were installed. Perfect!
Wrapping up:
Ansible roles simplify playbook files especially when you have multiple tasks to be executed across several hosts. Additionally, you can reuse roles for multiple hosts without the need of modifying the playbook file. If you found this guide useful, send us a shout and share it with your friends.
Read Also : How to Use Ansible Vault to Secure Sensitive Data